
Making a Professional Website
As a student or early-career researcher, you may have seen a trend in professional websites created by your peers. You may have wondered whether or not you, yourself, should make one. In this post, I will give you a couple of reasons why you should make a website and give a tutorial on how to do so using GitHub Pages.
Why make a website?
-
The most prominent reason that I believe in when creating your own website is to be able to share your research, highlight your progress, and advocate for yourself.
-
Your website also serves as an interactive CV that can provide a more visually appealing platform to present yourself.
-
Unlike your CV or other social media websites, you can provide resources to other students or researchers in the form of protocols, code, and data. Importantly, you can share your published papers freely, depending on the policies of your publisher.
-
You can also use your website as a professional history. You can keep track of your research progress and highlight achievements along the way.
-
While websites like LinkedIn and Twitter can be good sources of visibility. They have their own agenda with set templates for expressing yourself. Having your own website will allow complete control of how you are presented. It lets you control your message.
Create your website
Creating a website using GitHub Pages is free and also fairly easy. First, you will want to have a GitHub account, so head over there and create one. Once you have one, it is as easy as creating your own repository. I am going to give you two approaches. In the next steps, we can either create a website from scratch or use Jekyll. Personally, I like Jekyll since it is simpler and has built-in tools for creating content, but others may want to use their own setup. I highly recommend using Jekyll so skip to the Jekyll section if you want to use Jekyll.
Jekyll is a static site generator with built-in support for GitHub Pages and a simplified build process. Jekyll takes Markdown and HTML files and creates a complete static website based on your choice of layouts. Jekyll supports Markdown and Liquid, a templating language that loads dynamic content on your site. For more information, see Jekyll.
Setup
Create a new repository in your GitHub profile. In the repository name section, type in yourusername.github.io, where yourusername is your username. My username is danhtruong, so I would type in, danhtruong.github.io.
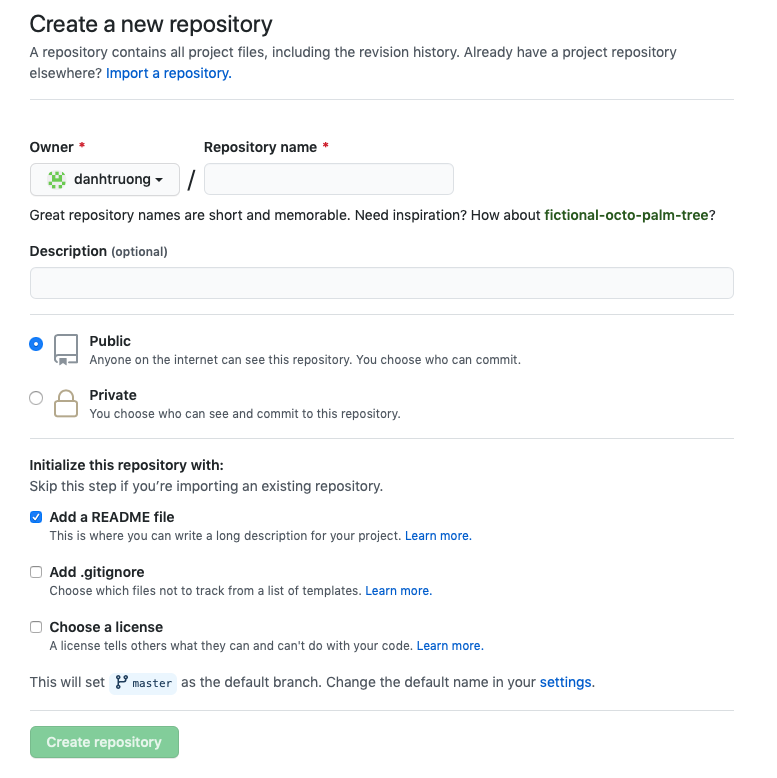
Now you can go on over to your new website and view it. You just need to type in the name of your repository. For me it would be, danhtruong.github.io.
It is as simple as that. You will want to start setting up an index.html and additional content for your website. Here is a tutorial if you are not familiar with using html. You can add these files to your repository.
Using Jekyll
I prefer Jekyll since it can generate a website for you as well as provide tools for content creation. You can install it using command line, but forking Jekyll Now, a repository with Jekyll already set up, would be easier. You can follow the readme.md in this repostitory or continue below.
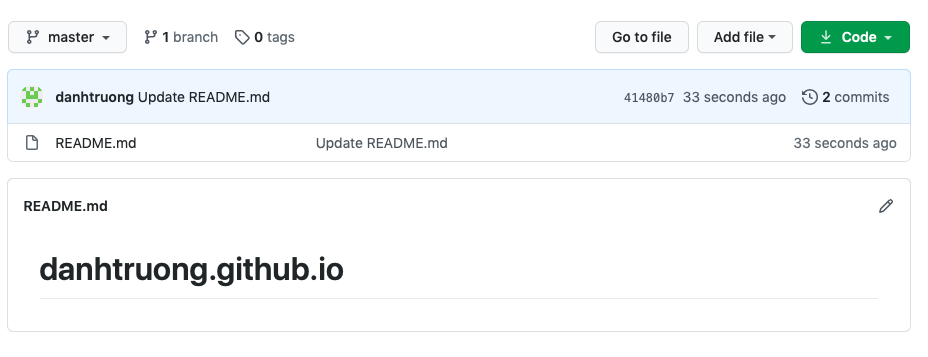
Go to the Jekyll Now page and click on fork to fork the repository to yours. Soon you should have a repository similar to mine.
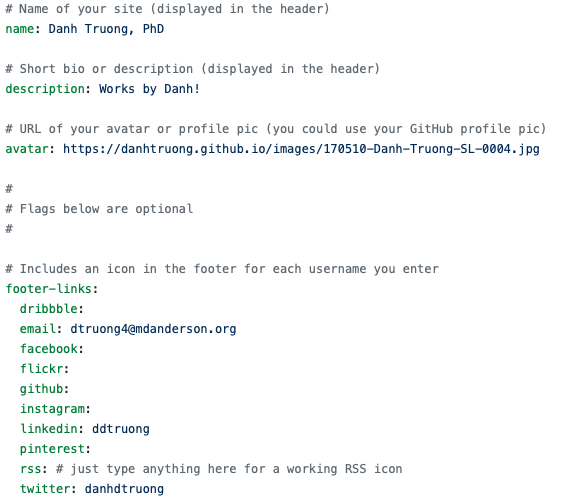
Edit the config.yml file and add your site name and description. There are also many other possible options that you can edit as well.
Let’s create your first blog post. You can edit the file /_posts/2014-3-3-Hello-World.md.
Alternatively, you can create a new file and type /_posts/2020-8-28-Hello-World.md into the name section. Add the front matter by typing the following.
---
layout: post
title: Hello, World!
---
This section contains predefined variables for your website. By calling layout: post, you are telling Jekyll that this page uses the post layout. You can find this specific layout in the /_layouts/. The variable title provides the title of the post. Now, you can begin typing our your blog post. You will need to be familiar with markdown but here is a Markdown Cheat Sheet to get you started.
---
layout: post
title: Hello, World!
---

Start creating content here!